This section explains how users can activate, start, manage, and complete charging sessions for a Power Center using the Powerly mobile app or any custom app created with the Powerly App Builder.
Activating a Power Center #
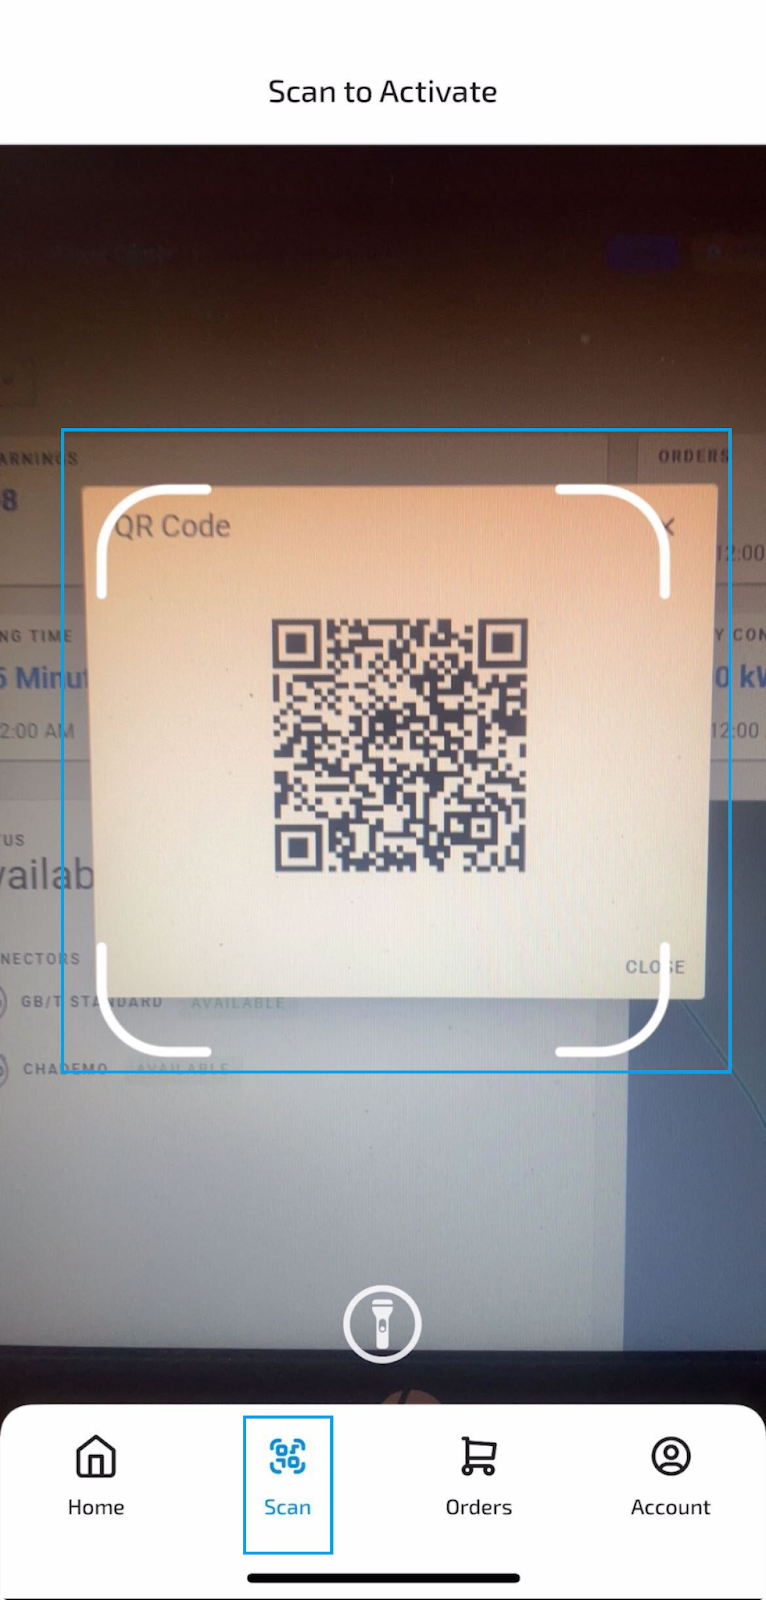
Once your Power Center is connected and set to Available, users can scan its QR code to open the Power Center page in the Powerly app or a custom app built with the Powerly App Builder.
Once scanned, the app will display:
- Power Center details
- Available connectors
- Actions such as starting a charging session
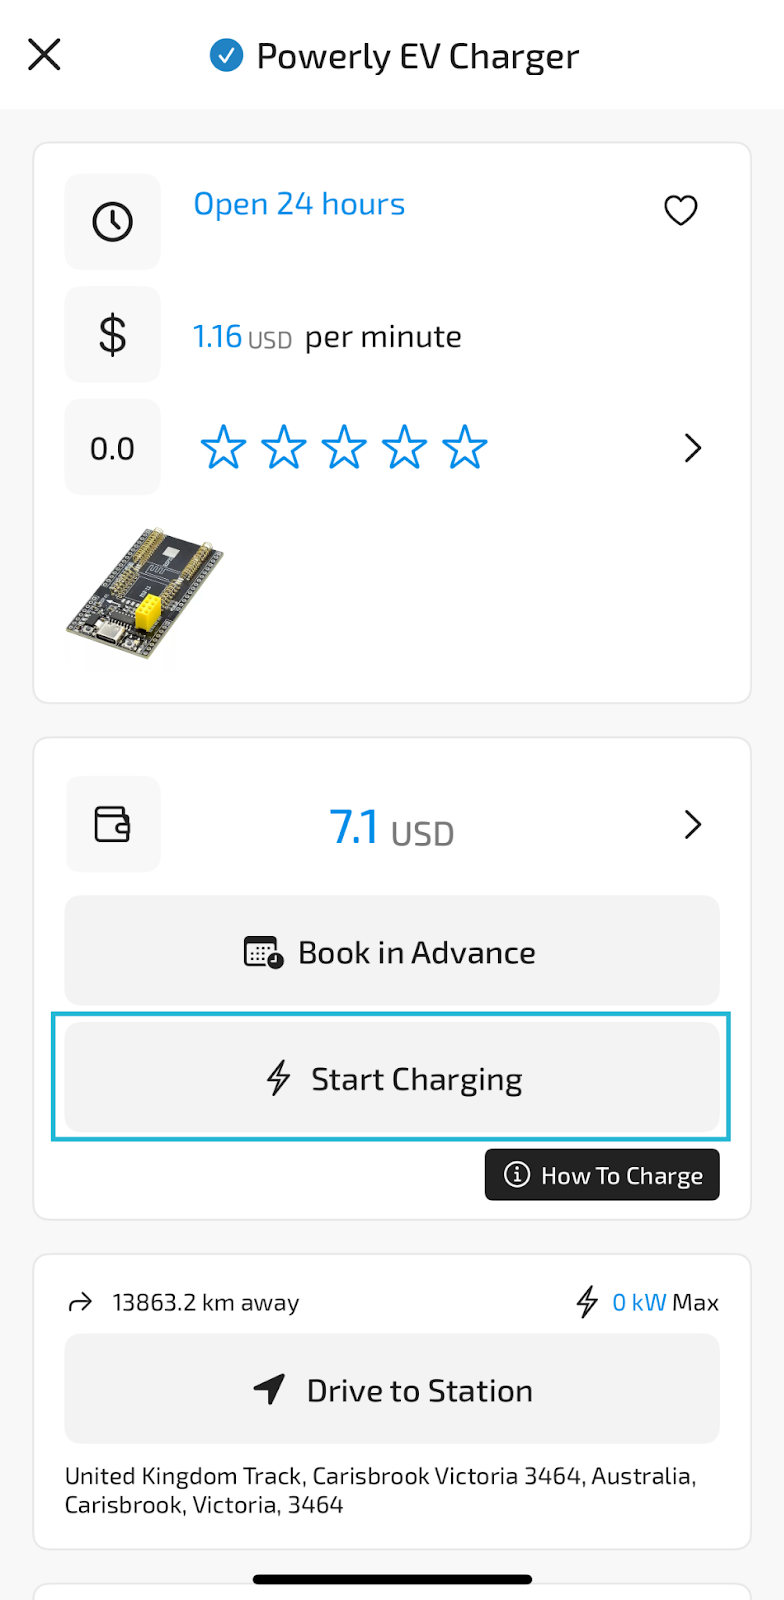
Starting a Charging Session #
On the Power Center page, tap Start Charging.
- Select the connector you want to use.
- Choose your session duration (if applicable).
- Tap Start Charging again to begin your session.
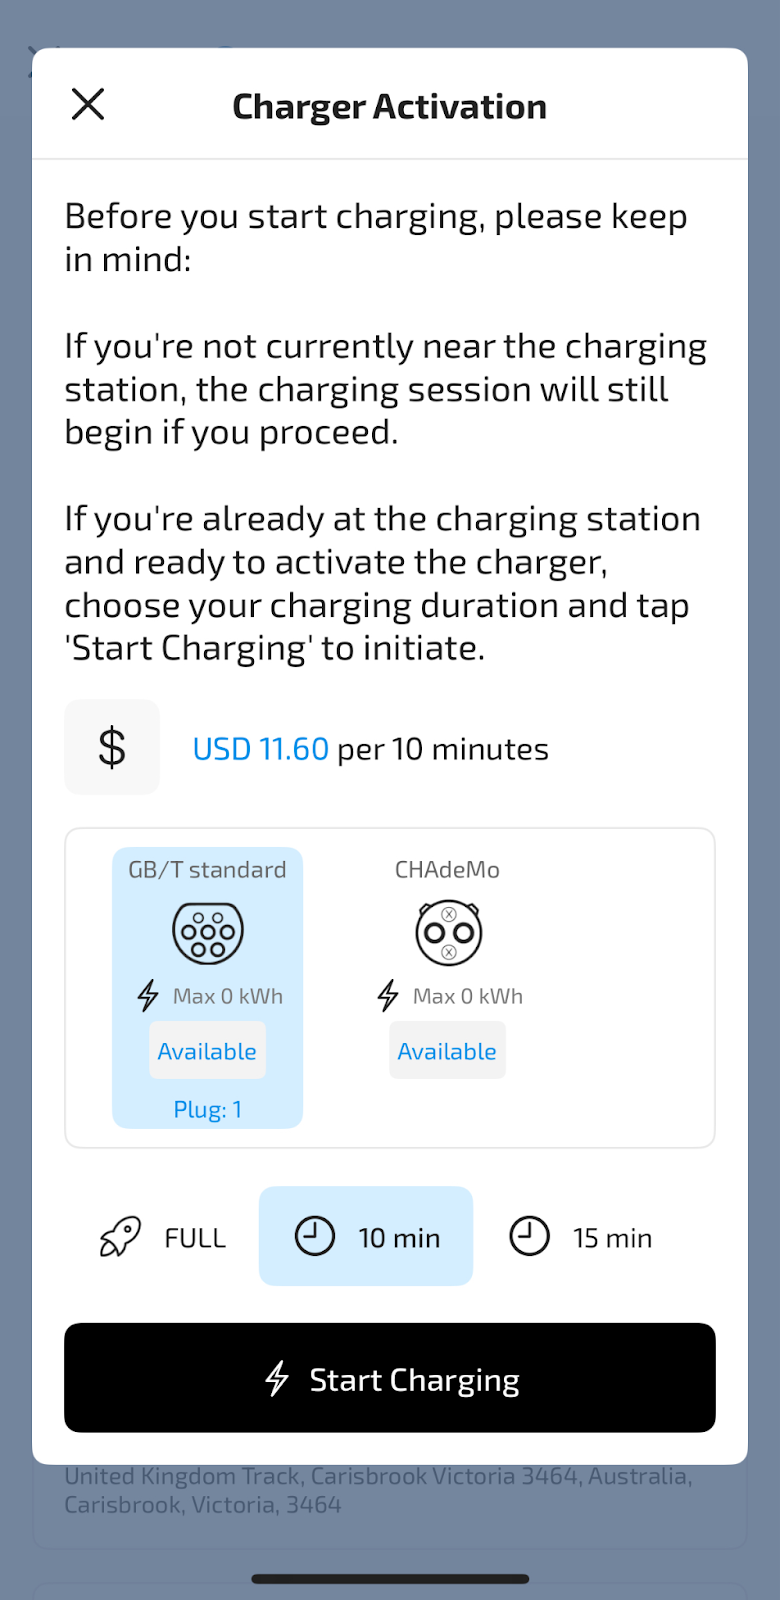
Your session will now be active and charging.
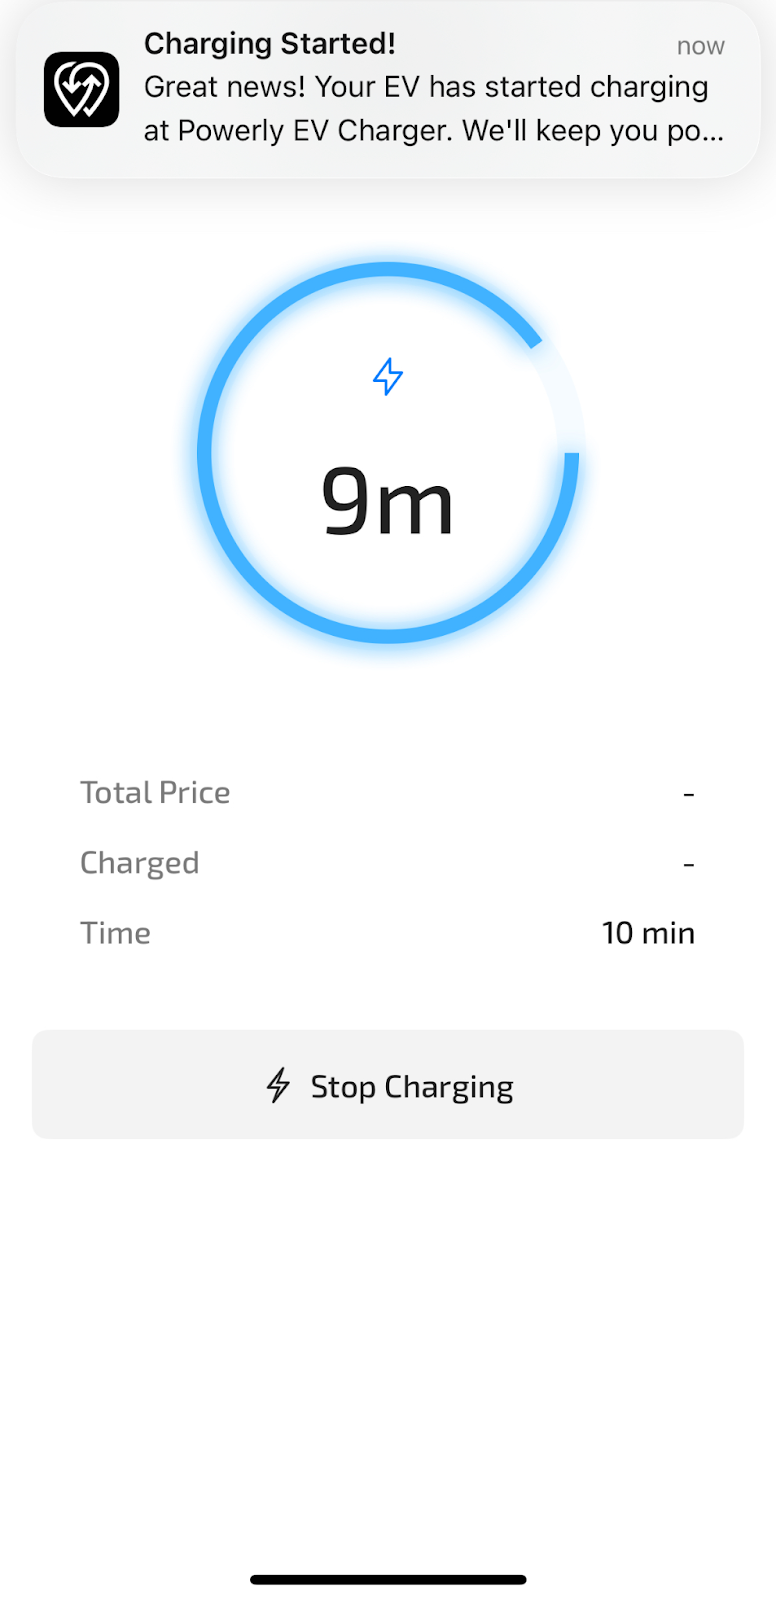
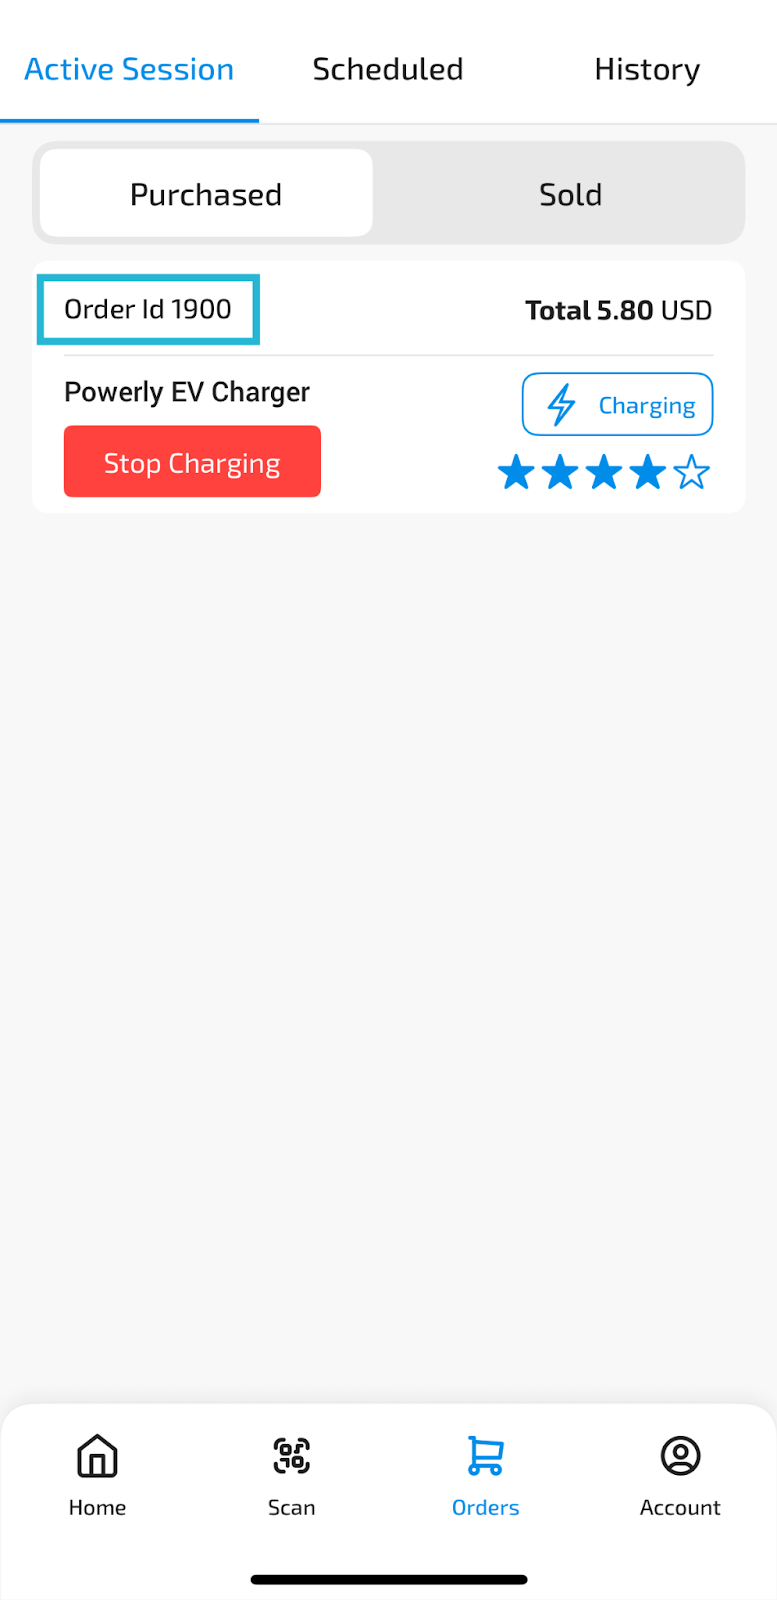
Managing Active Sessions #
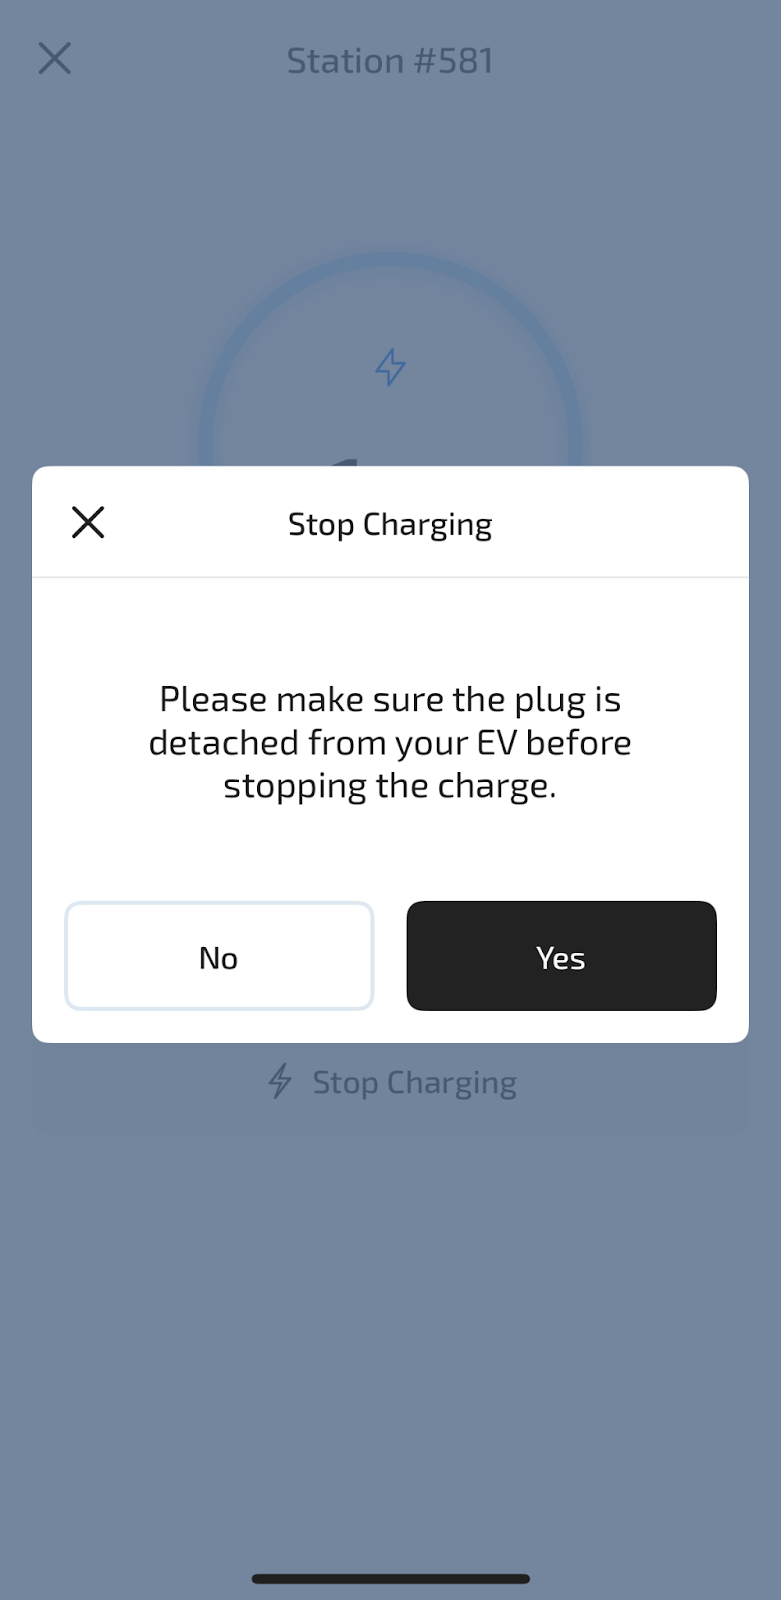
- You can stop your session at any time by tapping Stop Charging in the app.
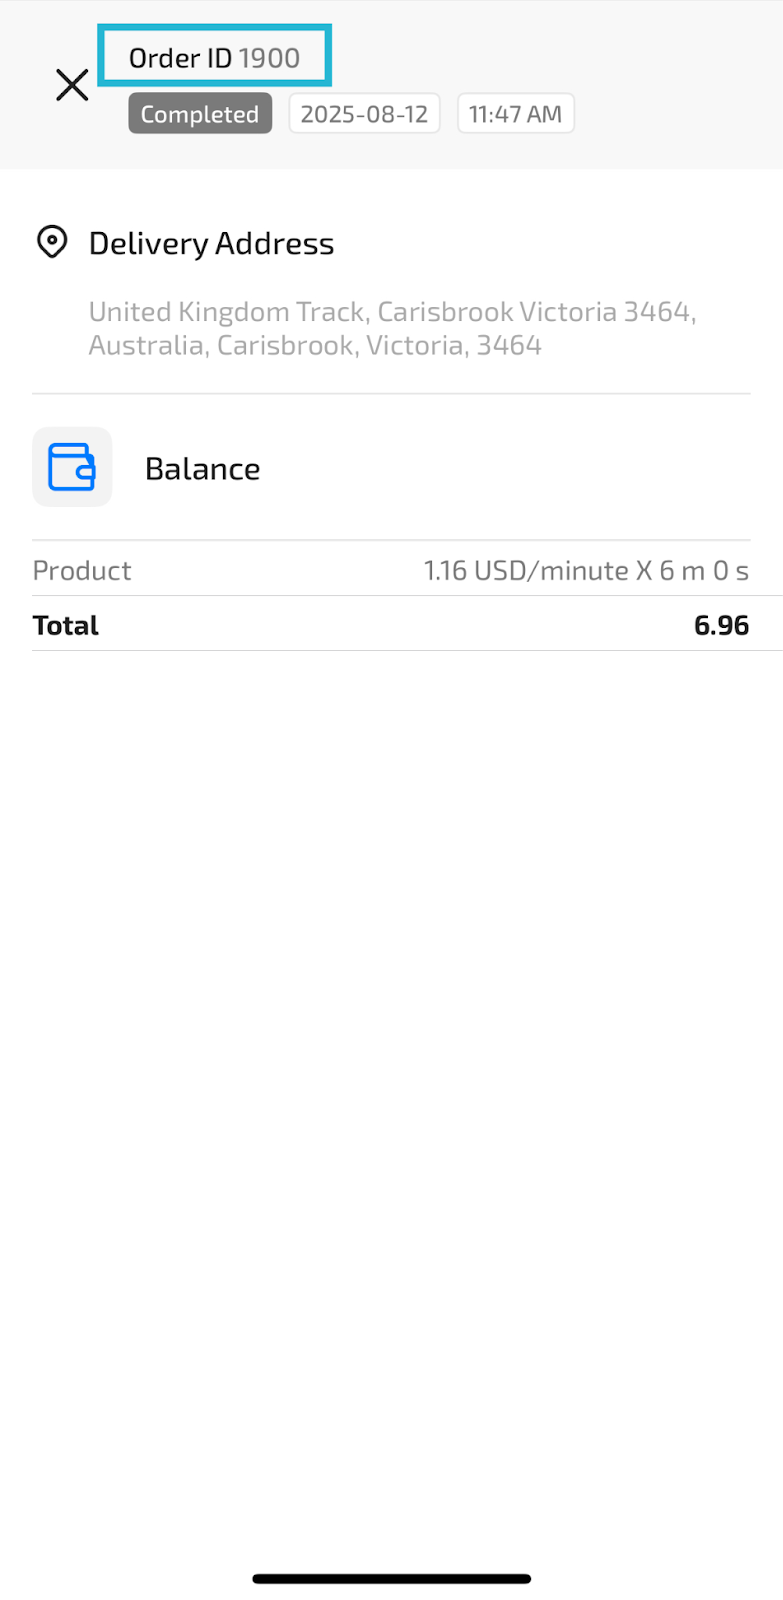
- During the session, you can view the Active Orders page for your Order ID and session details.
Completing a Session and Giving Feedback #
- Once your session ends, a feedback pop-up will appear in the app.
- Rate the Power Center, then tap Done to submit your feedback.
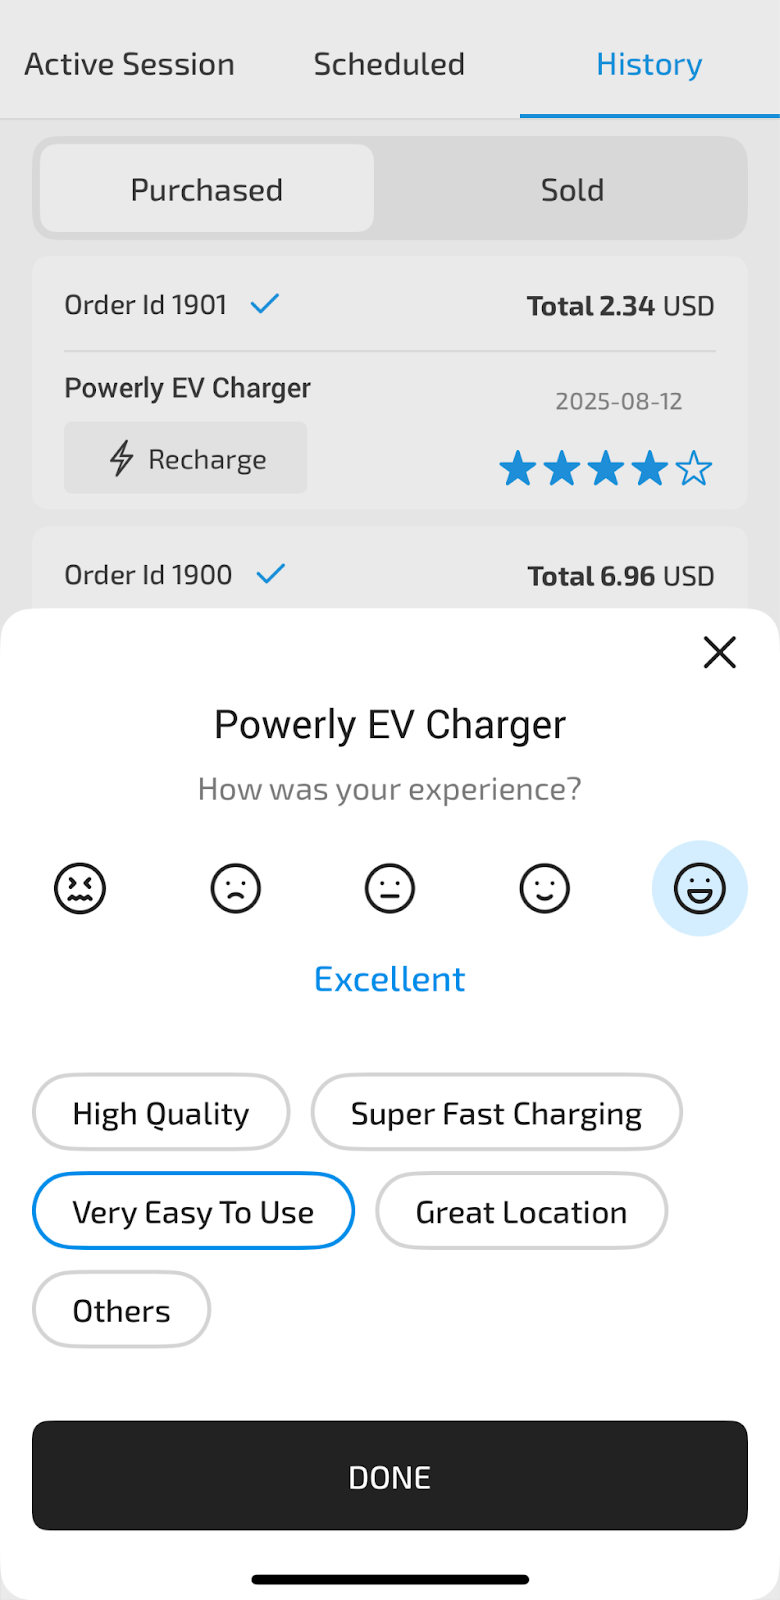
Viewing Past Sessions #
- All completed charging sessions are stored in the History page of the app.
- Each record includes the date, time, location, duration, and cost.
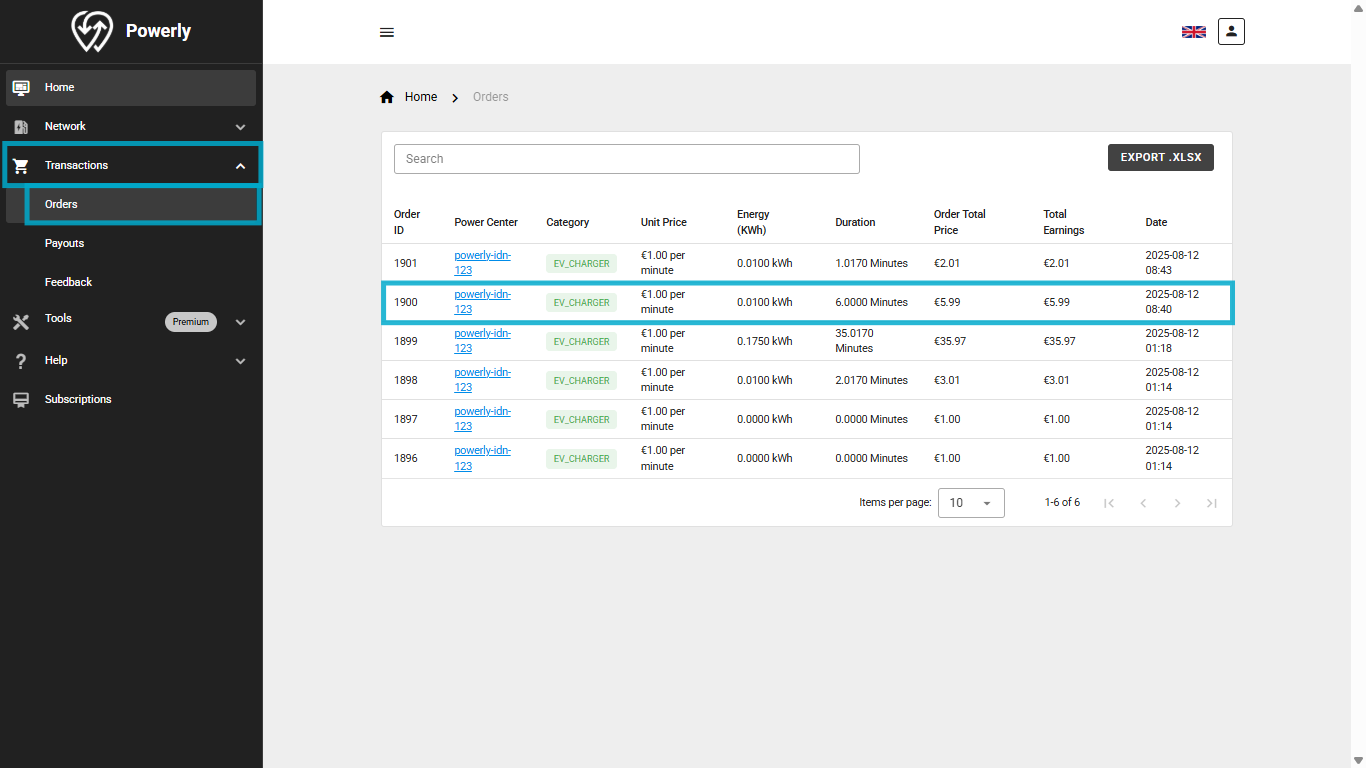
Power Center Orders in the Dashboard #
From the Powerly Dashboard:
- Open the specific Power Center page to see related orders, or
- Navigate to Transactions → Orders in the side menu for a complete list.
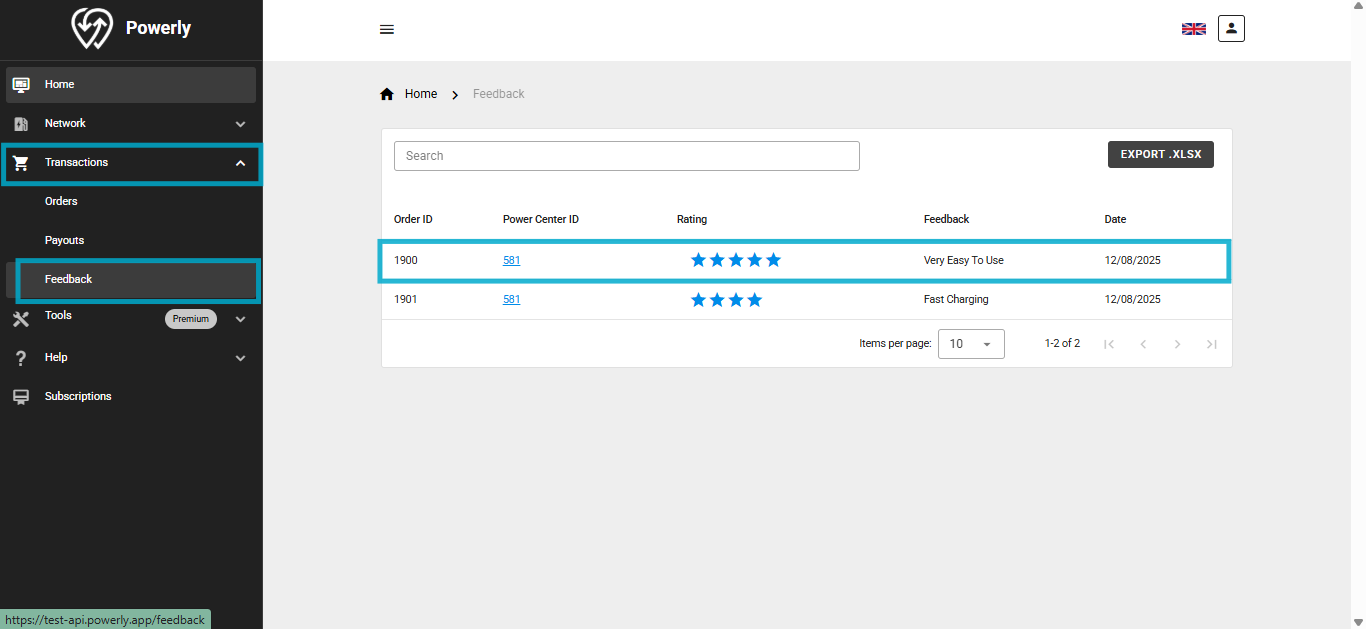
Viewing Feedback in the Dashboard #
To view feedback for your Power Center:
- Go to Transactions → Feedback in the side menu.
- Feedback includes ratings and any optional comments left by users.